# CentOS7 安装ejabberd
# 安装Erlang/OTP 22.0 ,可参考:CentOS 7 系统安装 Erlang/OTP 22.0 (opens new window) 进行安装
# 1.下载源码
git clone git://github.com/processone/ejabberd.git ejabberd
# 2.安装所需依赖
yum -y install make
yum -y install gcc
yum -y install gcc-c++
yum -y install kernel-devel
yum -y install m4
yum -y install ncurses-devel
yum -y install openssl-devel
yum -y install unixODBC-devel
yum -y install libtool
yum -y install libtool-ltdl-devel
yum -y install automake
yum -y install autoconf
yum -y install wx
yum -y install fop
yum -y install expat-devel
yum -y install libyaml-devel
yum -y install dos2unix
2
3
4
5
6
7
8
9
10
11
12
13
14
15
16
17
# 3.安装
cd ejabberd
./autogen.sh
2
3
./configure --enable-user=root --enable-mysql
[root@VM_0_2_centos ejabberd]# ./configure --enable-user=ejabberd --enable-mysql
checking whether make sets $(MAKE)... yes
checking for a BSD-compatible install... /usr/bin/install -c
checking for a sed that does not truncate output... /usr/bin/sed
checking for erl... /usr/local/bin/erl
checking for erlc... /usr/local/bin/erlc
checking for epmd... /usr/local/bin/epmd
checking for erl... /usr/local/bin/erl
checking for erlc... /usr/local/bin/erlc
checking Erlang/OTP version... ok
checking for Erlang/OTP root directory... /usr/local/lib/erlang
checking for escript... /usr/local/lib/erlang/bin/escript
checking for make... make
allow this system user to start ejabberd: ejabberd
configure: creating ./config.status
config.status: creating Makefile
config.status: creating vars.config
config.status: creating src/ejabberd.app.src
make install
安装所创建的文件和目录为:
/usr/local/etc/ejabberd/: Configuration directory:ejabberd.yml: ejabberd configuration fileejabberdctl.cfg: Configuration file of the administration scriptinetrc: Network DNS configuration file for Erlang
/usr/local/lib/ejabberd-19.09.65/:ebin/: Erlang binary files (*.beam)include/: Erlang header files (*.hrl)priv/: Additional files required at runtimebin/: Executable programslib/: Binary system libraries (*.so)msgs/: Translation files (*.msgs)
/usr/local/sbin/ejabberdctl: Administration script (see section ejabberdctl (opens new window))/usr/local/share/doc/ejabberd/: Documentation of ejabberd/usr/local/var/lib/ejabberd/: Spool directory:.erlang.cookie: Erlang cookie file (see section cookie (opens new window))acl.DCD, ...: Mnesia database spool files (*.DCD, *.DCL, *.DAT)
/usr/local/var/log/ejabberd/: Log directory (see section [logfiles]):ejabberd.log: ejabberd service logerlang.log: Erlang/OTP system log
# 4.启动
cd /usr/local/sbin
ejabberdctl start
2
# 5.查看服务状态
ejabberdctl status
# 6.停止服务
ejabberdctl stop
# 7.注册一个用户
ejabberdctl register admin localhost 123456
2
# 8.修改配置文件,设置admin可配置权限
acl:
  local:
    user_regexp: ""
  loopback:
    ip:
      - 127.0.0.0/8
      - ::1/128
  admin:
    user:
      - "admin": "localhost"

access:
  configure:
    admin: allow
2
3
4
5
6
7
8
9
10
11
12
13
14
15
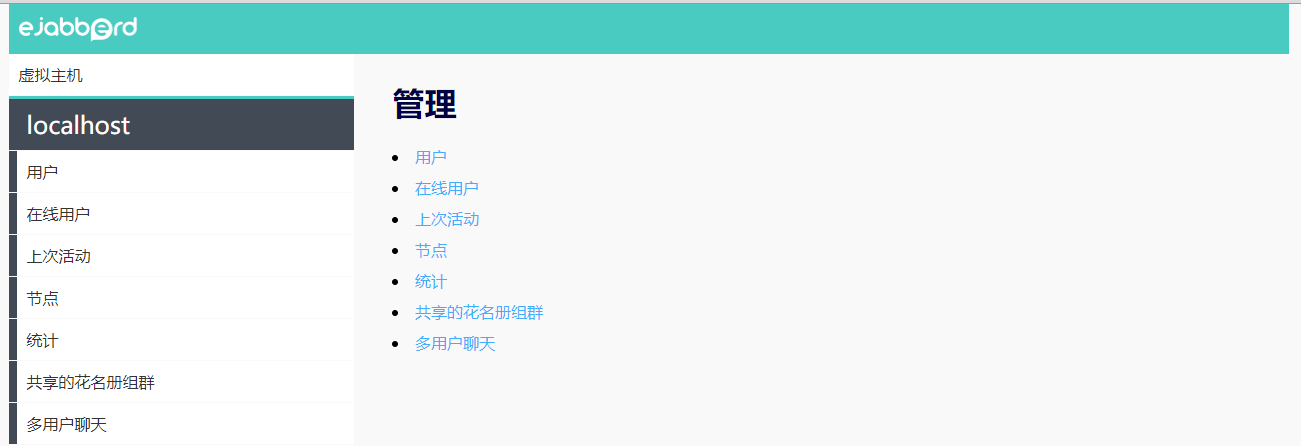
# 9.登录管理页面查看
http://localhost:5280/admin/ (opens new window) 用户名及密码:admin 123456

# 10.客户端登录测试
没有配置ttls证书,把starttls_required 设置成 false
listen:
  -
    port: 5222
    ip: "::"
    module: ejabberd_c2s
    max_stanza_size: 262144
    shaper: c2s_shaper
    access: c2s
    starttls_required: false
2
3
4
5
6
7
8
9
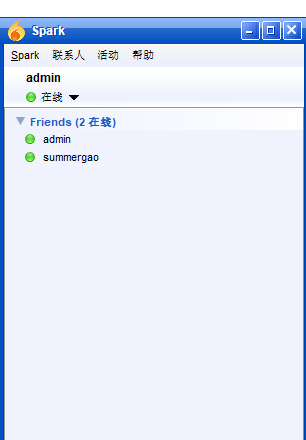
Spark客户端登录测试

# 11.Rest API消息推送接口测试
没有配置ttls证书,把tls 设置成 false
  -
    port: 5443
    ip: "::"
    module: ejabberd_http
    tls: false
    request_handlers:
      /admin: ejabberd_web_admin
      /api: mod_http_api
      /bosh: mod_bosh
      /captcha: ejabberd_captcha
      /upload: mod_http_upload
      /ws: ejabberd_http_ws
2
3
4
5
6
7
8
9
10
11
12
13
在acl:节点下添加如下配置
acl:
  local:
    user_regexp: ""
  loopback:
    ip:
      - 127.0.0.0/8
      - ::1/128
      - ::FFFF:49.234.110.112/16 #改成自己主机的ip地址
  admin:
    user:
      - "admin": "www.xxx.xyz"
    ip:
      - ::FFFF:49.234.110.112/16 #改成自己主机的ip地址
access:
  configure:
    admin: allow
2
3
4
5
6
7
8
9
10
11
12
13
14
15
16
在api_permissions:节点下添加如下配置
  "API used from localhost allows all calls":
    who:
      ip: 127.0.0.1/8
    what:
      - "*"
      - "!stop"
      - "!start"
2
3
4
5
6
7
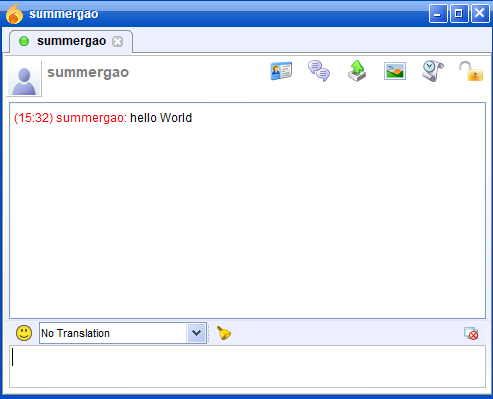
send_message接口测试
用postman给summergao用户推送消息

用Spark客户端接收消息
# 
# 问题总结:
{
 "status": "error",
 "code": 32,
 "message": "AccessRules: Account does not have the right to perform the operation."
}
2
3
4
5
解决办法:
将我的ip / range添加到admin AND loopback块中:
追加:- ::FFFF:49.234.110.112/16
acl:
  local:
    user_regexp: ""
  loopback:
    ip:
      - 127.0.0.0/8
      - ::1/128
      - ::FFFF:127.0.0.1/128
      - ::FFFF:49.234.110.112/16
  admin:
    user:
      - "admin@localhost"
    ip:
      - ::FFFF:49.234.110.112/16
2
3
4
5
6
7
8
9
10
11
12
13
14
# 参考:
https://docs.ejabberd.im/developer/ejabberd-api/simple-configuration/ (opens new window)
https://docs.ejabberd.im/developer/ejabberd-api/admin-api/#send-message (opens new window)