# 解决Linux buffer cache内存占用过高的办法
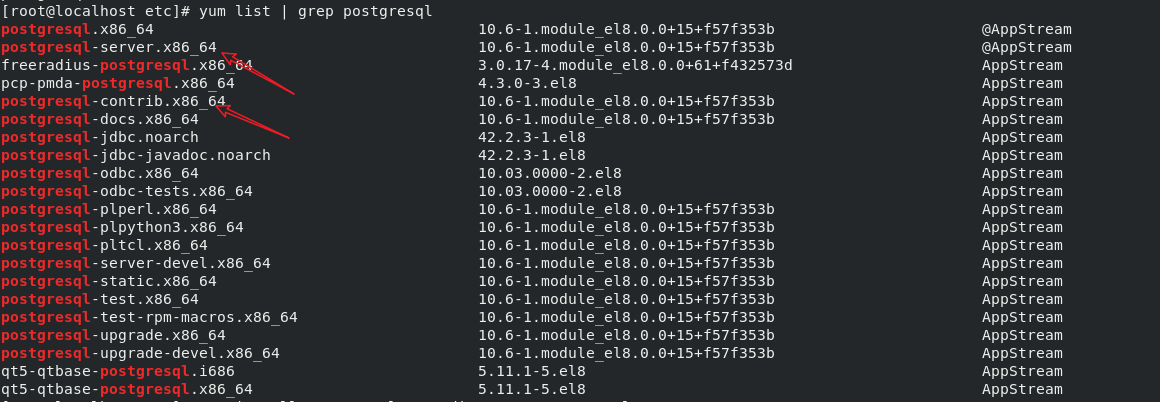
# 1. 先查看postgresql源
yum list | grep postgresql
# 2. 安装
我们需要安装的是这两个:postgresql-contrib.x86_64 postgresql-server.x86_64
yum install postgresql-contrib.x86_64 postgresql-server.x86_64 -y
# 3. 初始化数据库
sudo postgresql-setup initdb

# 4. 启动PostgreSQL服务,并配置为其能够在系统启动时启动
sudo systemctl enable --now postgresql
# 5. 使用该psql工具通过连接到PostgreSQL数据库服务器来验证安装并打印其版本
sudo -u postgres psql -c "SELECT version();"

# 6. PostgreSQL角色和验证方法
PostgreSQL使用角色的概念来处理数据库访问权限。角色可以代表一个数据库用户或一组数据库用户。
PostgreSQL支持多种身份验证方法。最常用的方法是:
- 信任-只要符合定义的条件,角色就可以不使用密码进行连接
pg_hba.conf。 - 密码-角色可以通过提供密码进行连接。密码可以存储为
scram-sha-256,md5和password(明文)。 - 标识符-仅在TCP/IP连接上受支持。它通过获取客户端的操作系统用户名以及可选的用户名映射来工作。
- 对等-与Ident相同,但仅在本地连接上受支持。
PostgreSQL客户端身份验证在名为pg_hba.conf的配置文件中定义。默认情况下,对于本地连接,PostgreSQL设置为使用对等身份验证方法。
在你安装PostgreSQL服务器过程中postgres用户会被自动创建。该用户是PostgreSQL实例的超级用户,你可以看成等效于MySQL的root用户。
要以postgres用户身份登录到PostgreSQL服务器,需要首先切换到该用户,然后运行psql命令程序访问PostgreSQL提示符:
sudo su - postgres
psql
2

我们来设置密码:
ALTER USER postgres WITH PASSWORD '密码';
从这里,可以与PostgreSQL实例进行交互。要退出PostgreSQL shell,请输入:
\q
还可以访问PostgreSQL提示符,而无需使用以下sudo (opens new window)命令切换用户:
sudo -u postgres psql
通常,postgres仅从本地主机使用该用户。
# 7.创建PostgreSQL角色和数据库
只有超级用户和具有CREATEROLE特权的角色才能创建新角色。
在以下示例中,我们将创建一个名为zotonic的新角色,一个名为zotonic的数据库,并授予该数据库的特权。
01、首先,连接到PostgreSQL shell:
sudo -u postgres psql
02、使用以下命令创建一个新的PostgreSQL角色:
create role zotonic;

03、创建一个新的数据库:
create database zotonic;

04、通过运行以下查询,向数据库上的用户授予特权:
grant all privileges on database zotonic to zotonic;
# 
# 8. 启用对PostgreSQL服务器的远程访问
默认情况下,PostgreSQL服务器仅供本地(127.0.0.1)访问。
要启用对PostgreSQL服务器的远程访问,请打开配置文件:
sudo vim /var/lib/pgsql/data/postgresql.conf
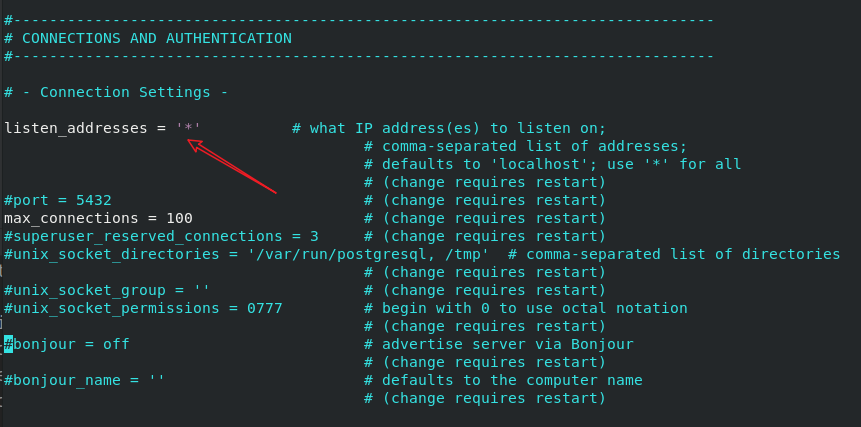
在打开文件中找到CONNECTIONS AND AUTHENTICATION部分,然后添加/编辑以下行:
#------------------------------------------------------------------------------
# CONNECTIONS AND AUTHENTICATION
#------------------------------------------------------------------------------

# - Connection Settings -

listen_addresses = '*'     # what IP address(es) to listen on;
2
3
4
5
6
7
8
保存文件,并使用以下命令重新启动PostgreSQL服务:
sudo systemctl restart postgresql
使用ss实用程序验证更改:
ss -nlt | grep 5432
如果已经正常启动,会输出如下内容:

LISTEN   0    128    0.0.0.0:5432    0.0.0.0:*
LISTEN   0    128    [::]:5432      [::]:*
2
上面的输出显示PostgreSQL服务器正在所有接口(0.0.0.0)的默认端口上侦听。
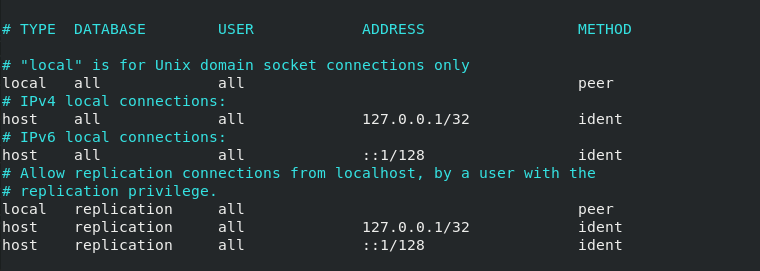
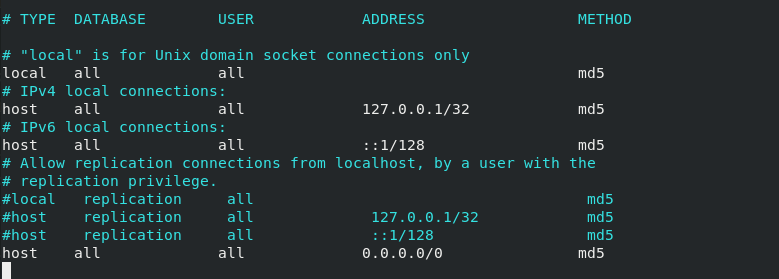
最后一步是通过编辑/var/lib/pgsql/data/pg_hba.conf文件将服务器配置为接受远程连接。
sudo vim /var/lib/pgsql/data/pg_hba.conf
修改前:
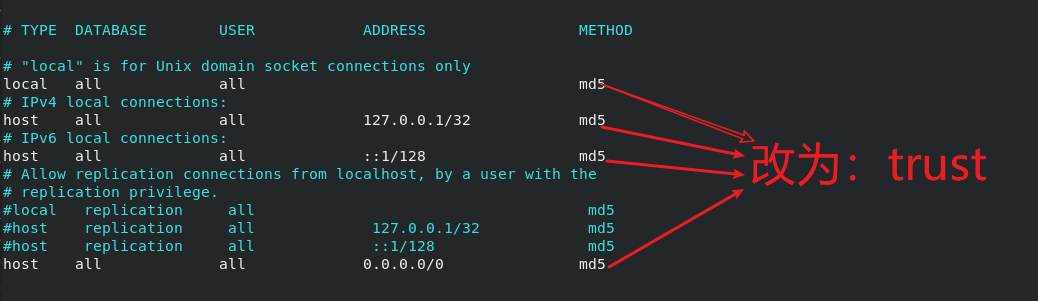
修改后:
以下是一些显示不同用例的示例(可以参考):
# TYPE  DATABASE        USER            ADDRESS                 METHOD

# The user zotonic can access all databases from all locations using an md5 password
host    all             zotonic            0.0.0.0/0                md5

# The user zotonic can access only the zotonic database from all locations using an md5 password
host    zotonic          zotonic            0.0.0.0/0                md5

# The user zotonic can access all databases from a trusted location (192.168.1.105) without a password
host    all             zotonic            192.168.1.105            trust
2
3
4
5
6
7
8
9
10
重新启动PostgreSQL服务
sudo systemctl restart postgresql
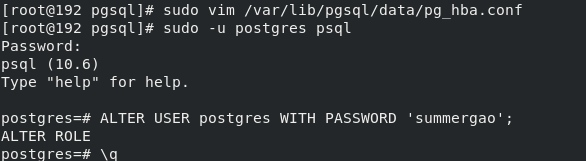
# 9.第一次登陆忘记修改密码解决办法
1.编辑 vim /var/lib/pgsql/data/pg_hba.conf
sudo vim /var/lib/pgsql/data/pg_hba.conf
2.重新启动PostgreSQL服务
sudo systemctl restart postgresql
3.连接到PostgreSQL shell
sudo -u postgres psql
4.修改密码
ALTER USER postgres WITH PASSWORD '密码';
# 10.修改linux系统的postgres用户的密码(密码与数据库用户postgres的密码相同)
1.删除PostgreSQL用户密码
sudo passwd -d postgres

passwd -d 是清空指定用户密码的意思
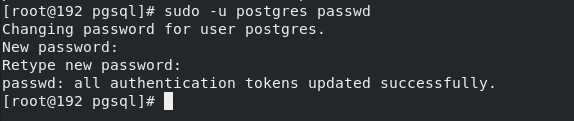
2.设置PostgreSQL用户密码
sudo -u postgres passwd